Why do we need to set up Development Environment On Godaddy?
Sometimes we need to make some changes on our live site that can affect our website. That’s why we need a copy of our live site. so, that we can do changes to the website without affecting the live site. That copied site is called “Development Environment”, Where the developers can do changes and preview it before uploading it to the live site.
How to do Setup Development Environment On GoDaddy
Once your WordPress website has gone live, you need to have a development website to implement further functionalities. Your development environment must be a copy of your original website. Having a development environment for a website is helpful that, if we want any advanced features to be implemented on our website, implementing it directly on a live website is dangerous because a small mistake may affect our website. So we may lose our website. But if we have a development environment, we can implement any feature there first, test it, and then copy it to our live website.
To Create a Development environment for your Website hosted on GoDaddy, follow the below process,
Create a Subdomain
First, we need to create a Subdomain for our development website, to create a subdomain,
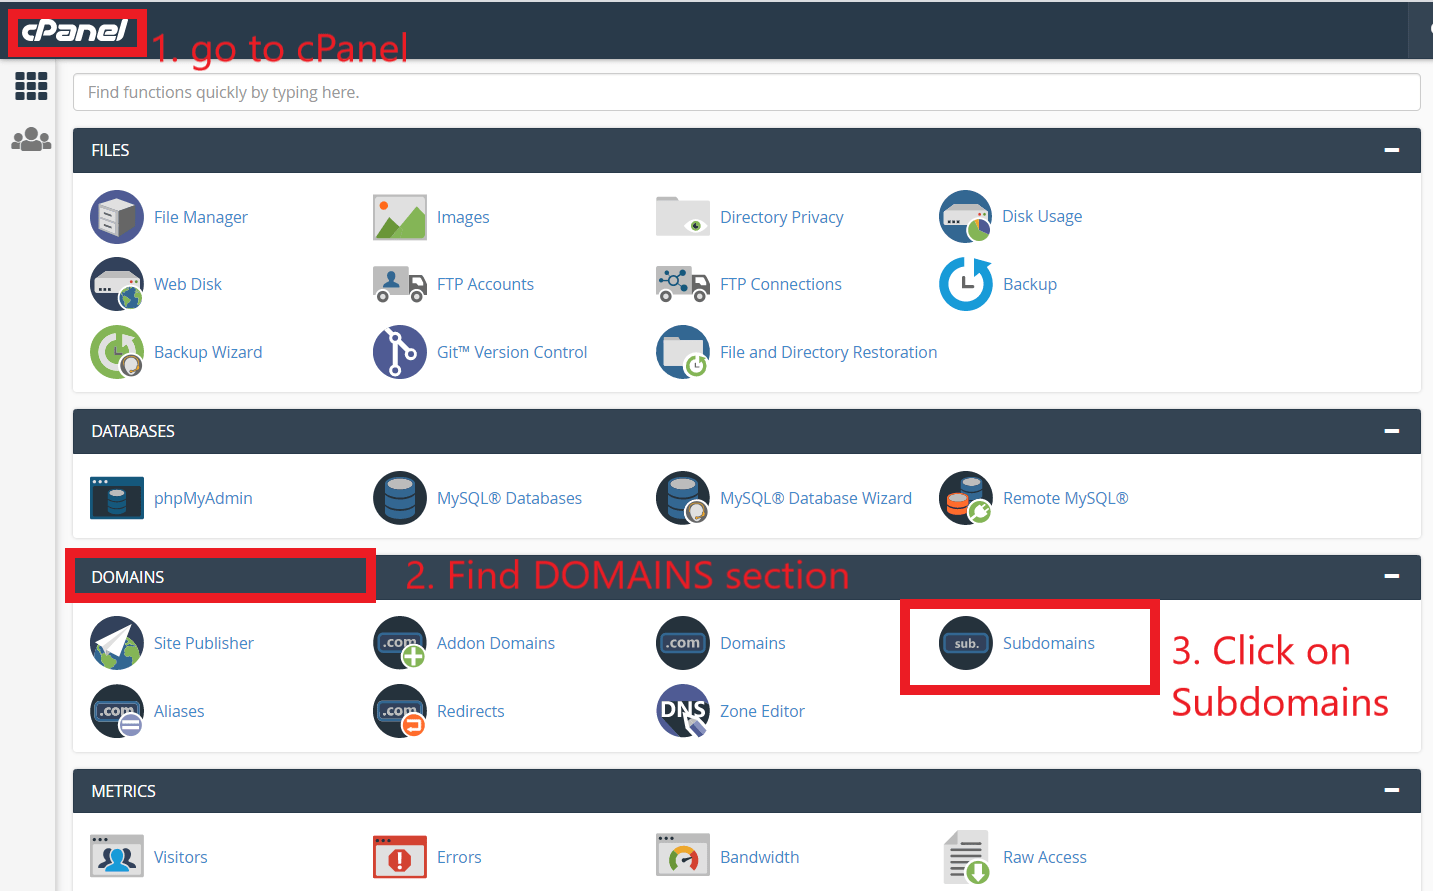
- Go to GoDaddy cPanel, find the DOMAINS section, and then click on Subdomains
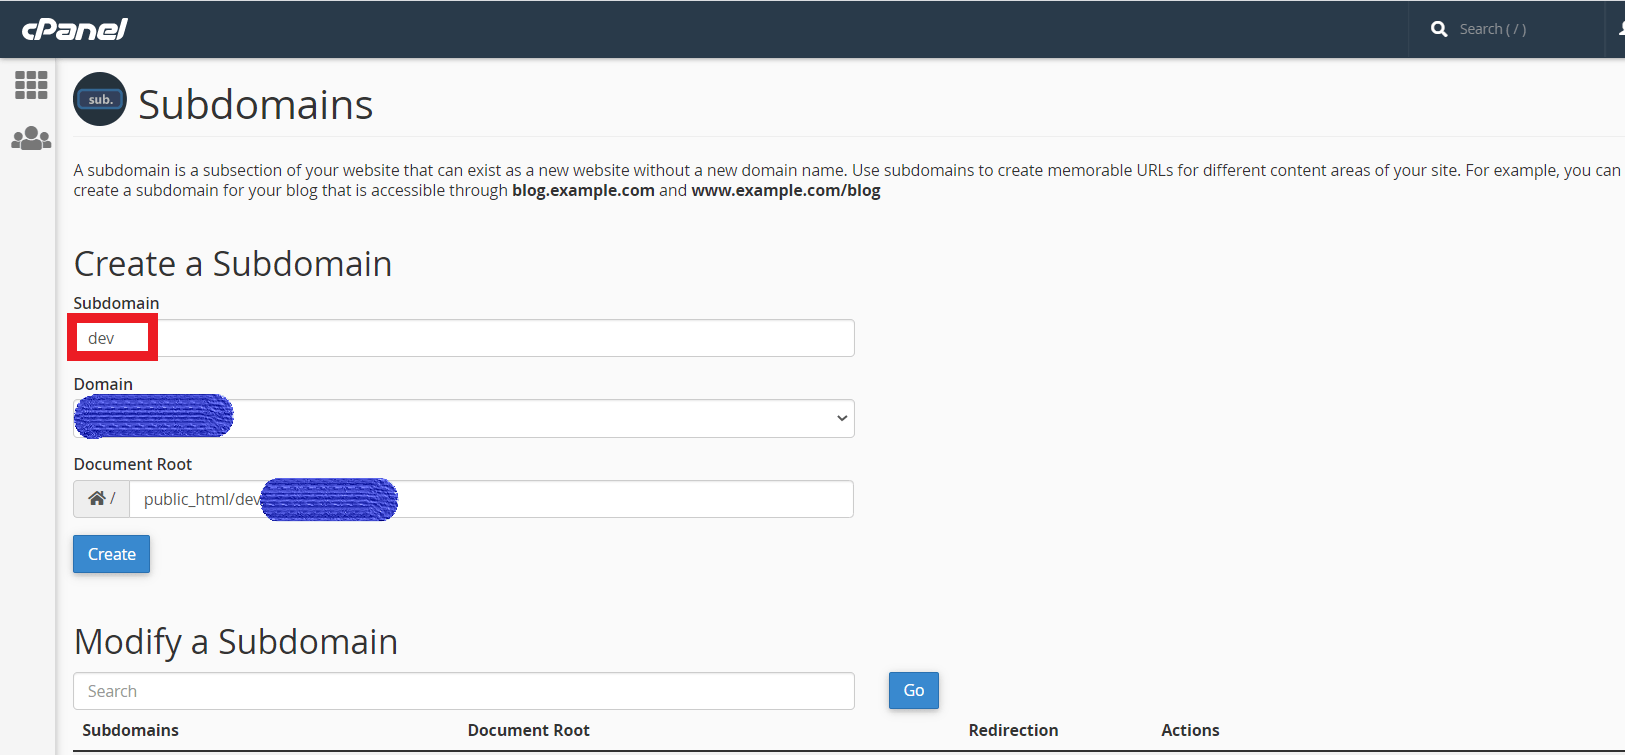
- Now create a new Subdomain for your Development website. Give your Subdomain a name, select your website Domain, keep Document Root as default, and then click on Create.
Copy Main Website files into Subdomain
To create a replica of the Live website, we need to copy all the files from the Main website root directory to Subdomain.
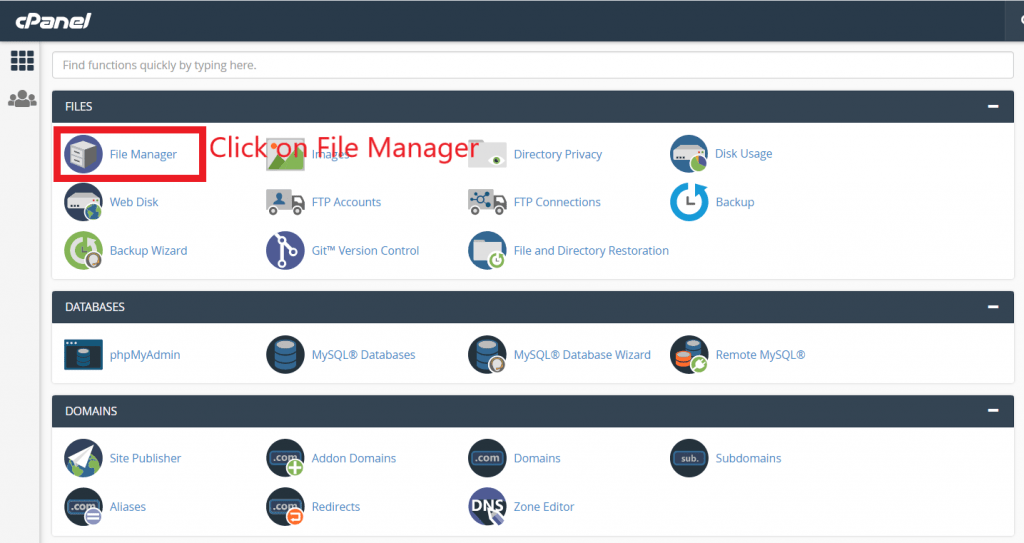
- Go to GoDaddy cPanel, select File Manager
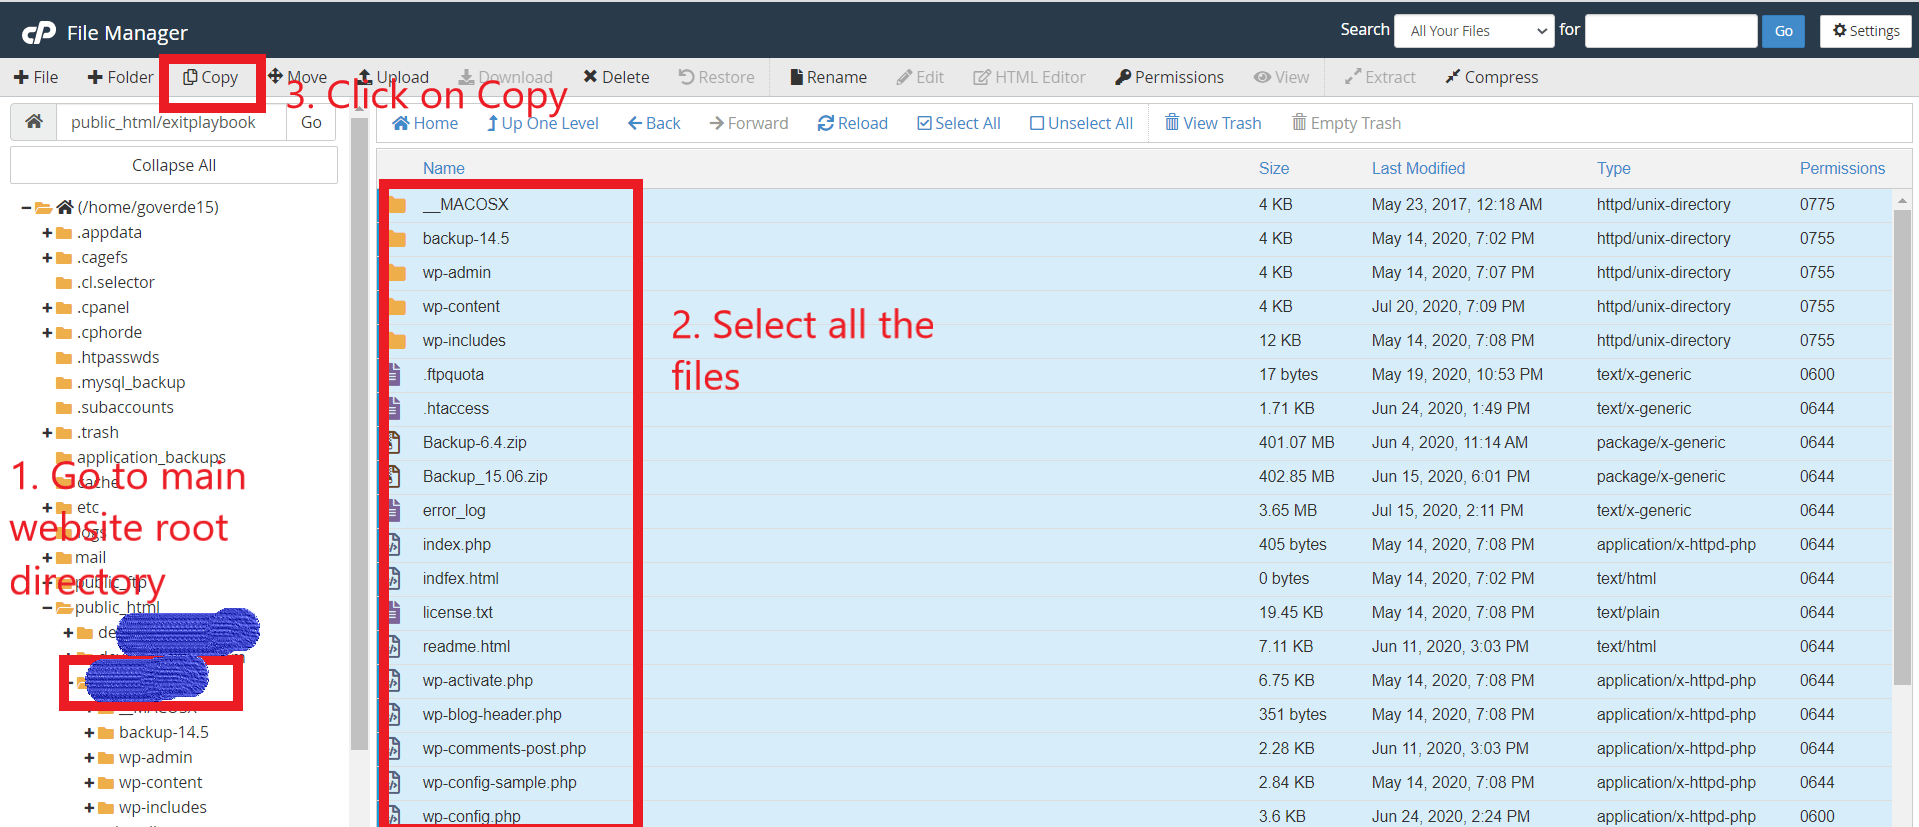
- Go to your main website root directory, select all the files from there and click on Copy
- In the popup box, give your Subdomain root directory path and click on Copy Files.
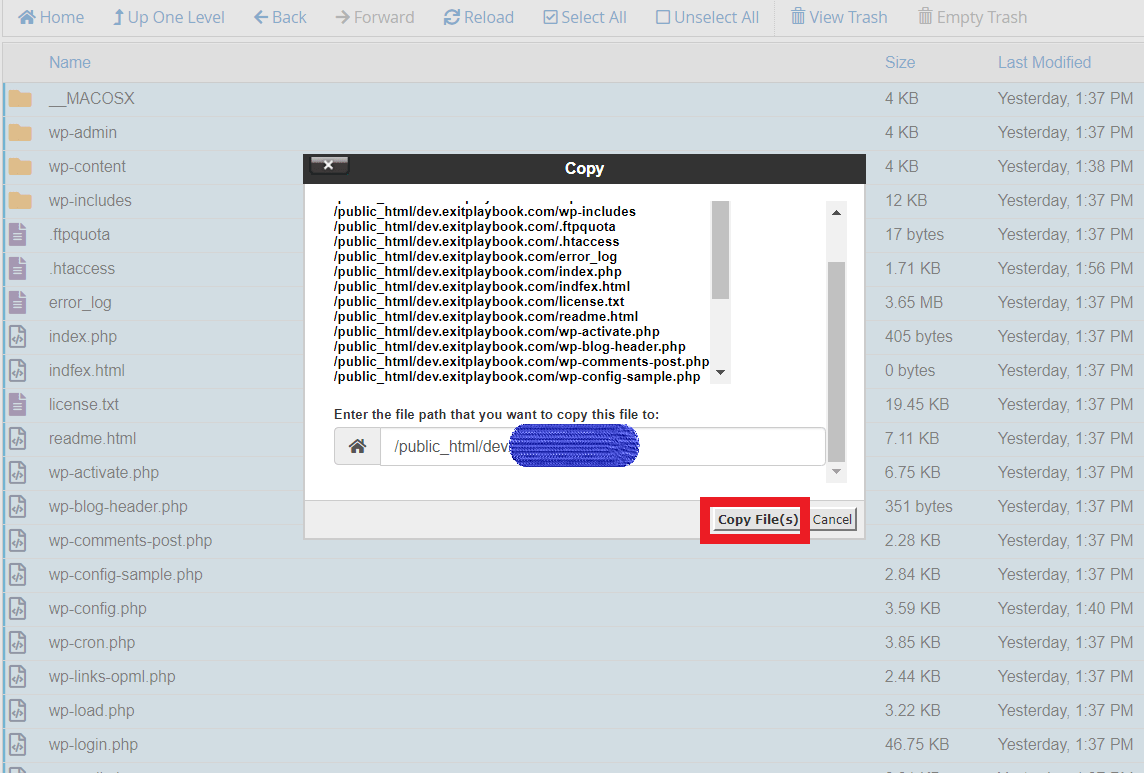
Now, check your subdomain directory, you will see all files there.
Copy the Main website database to the new database
After copying all the website files, we now need to copy the main website database to make sure the development website and live website are the same.
- To create a Database replica, go to MySQL Database Wizard from the cPanel DATABASES section.
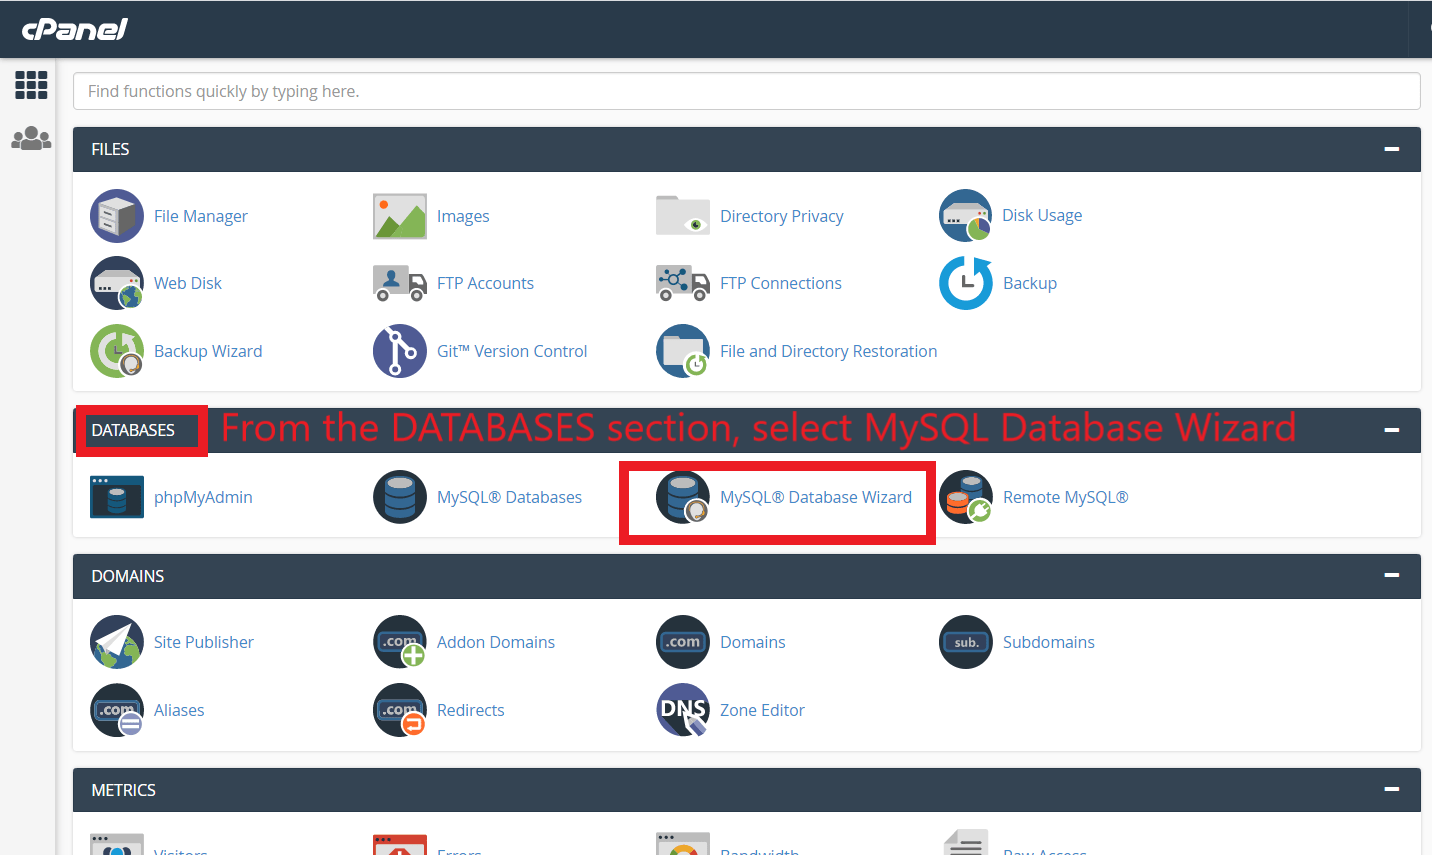
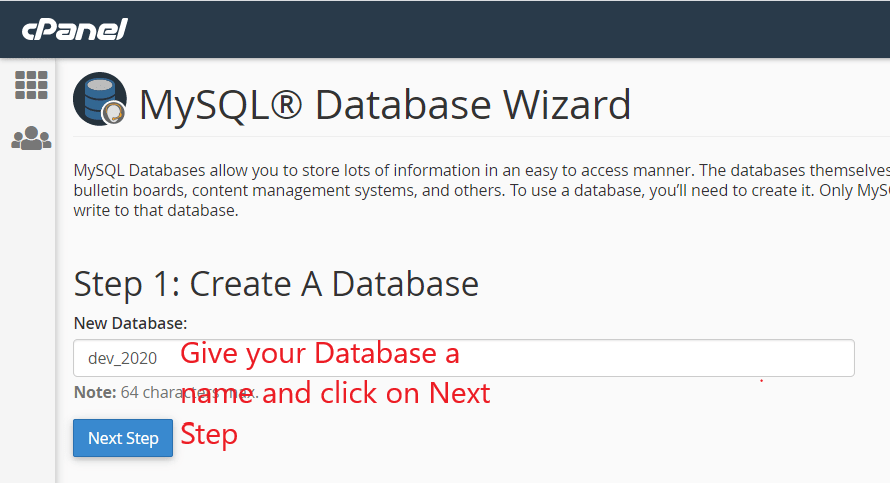
- Give your new Database a name and proceed with the Next Step.
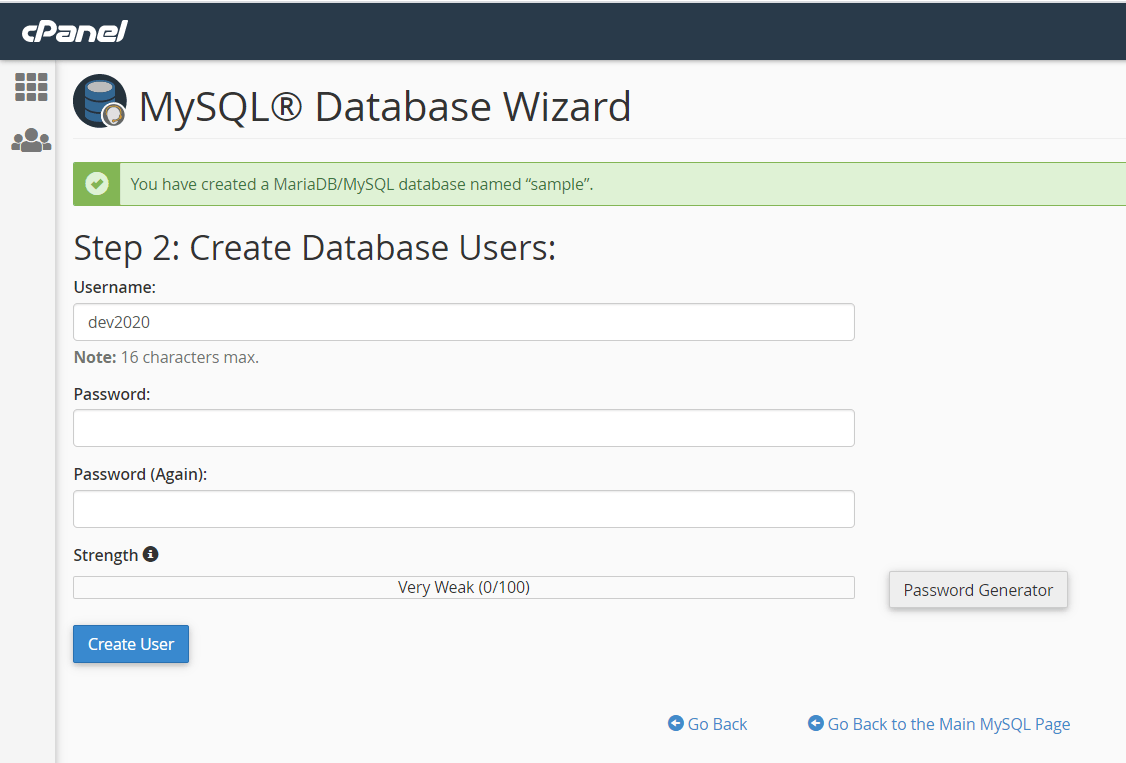
- In the next step, create a user for your database
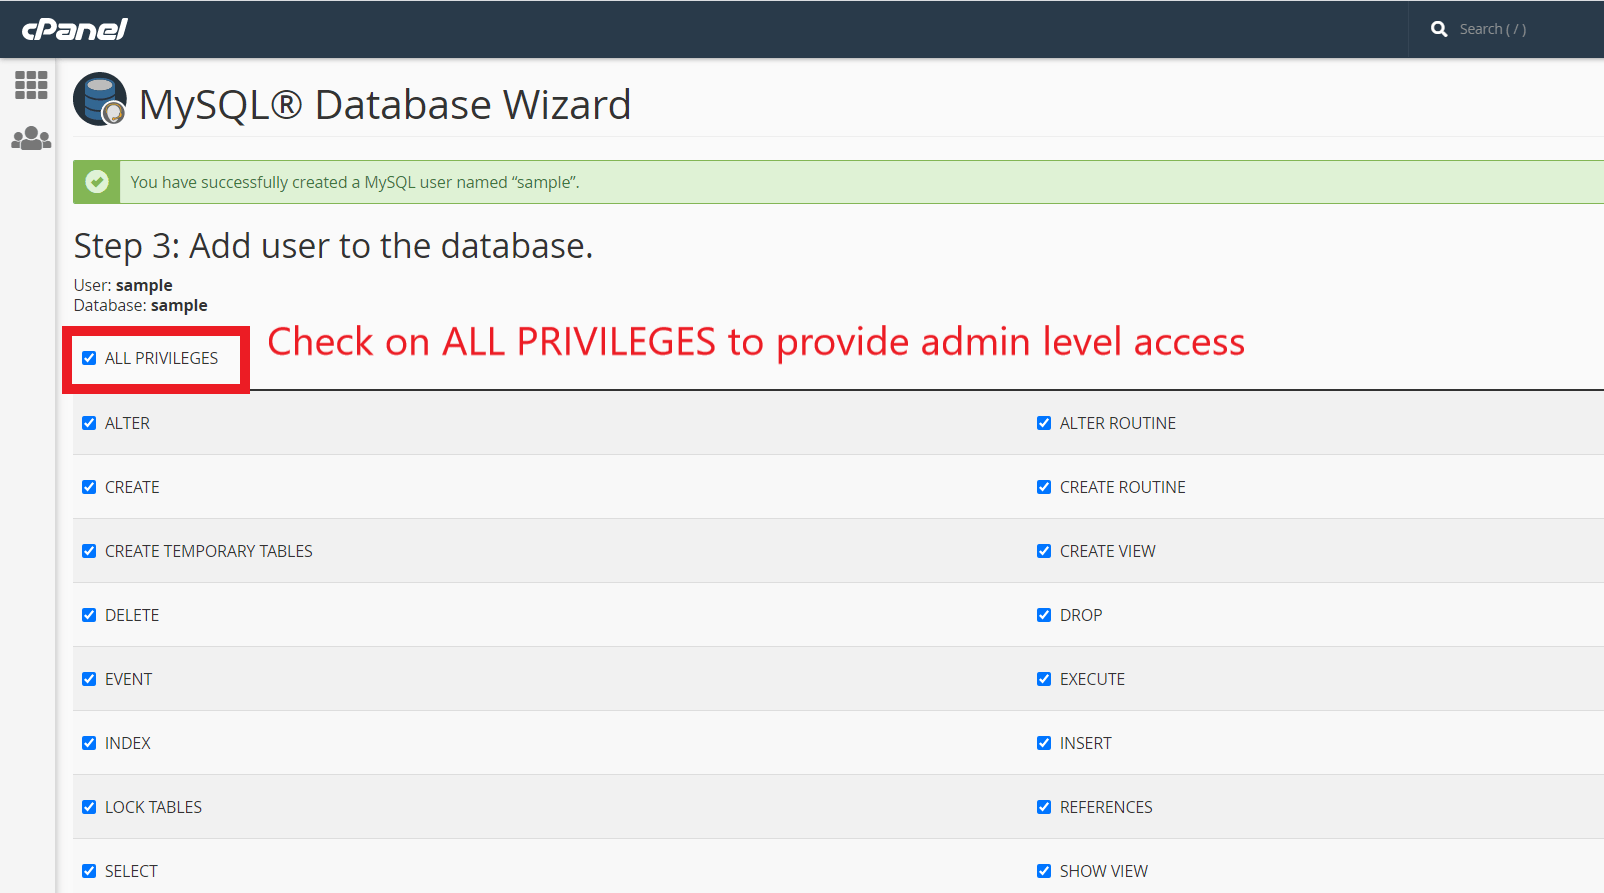
- Now give access to the User on your preference, to provide admin level access, you can check ALL PRIVILEGES and click on complete. Your new database is ready now.
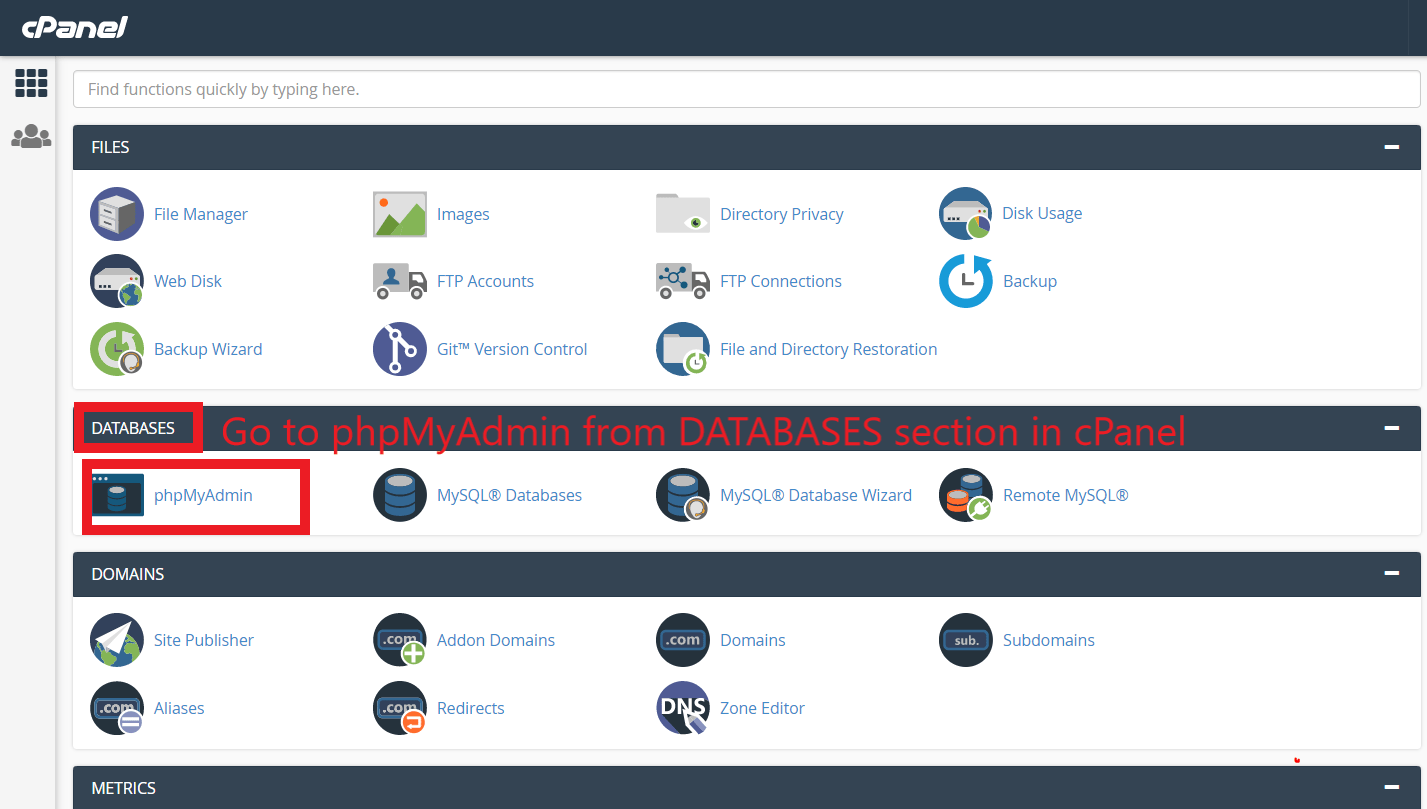
- Click on phpMyAdmin now to access your databases.
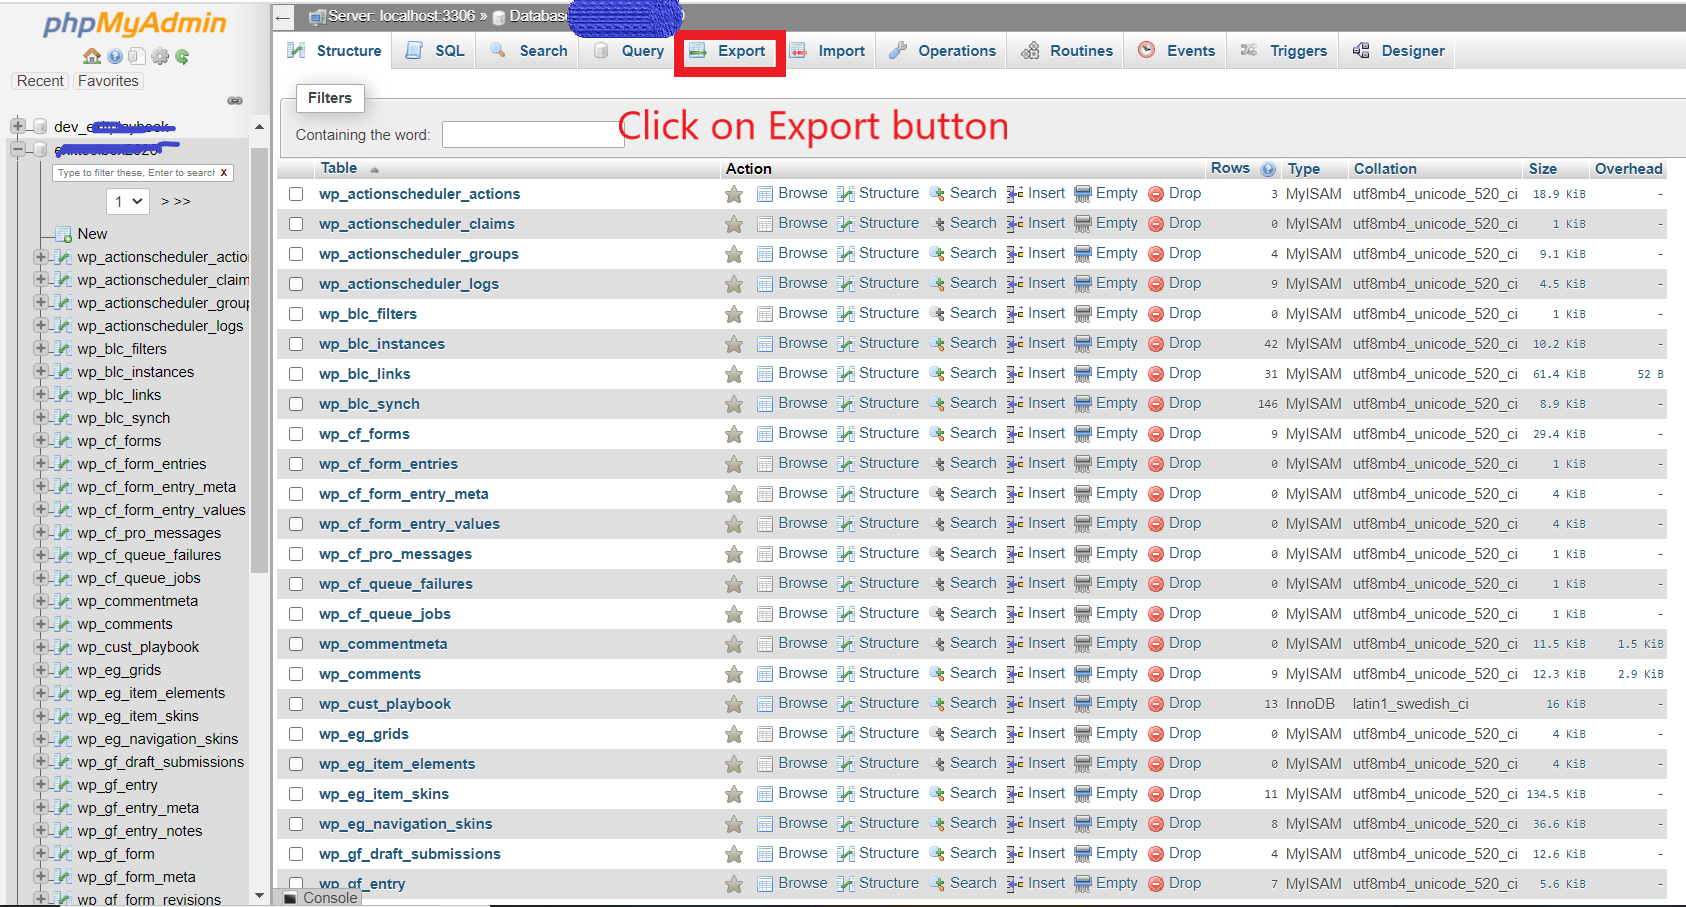
- Click on Live website Database and then click on Export option to export all the databases.
- Now click on the new development database, click on the import button, browse the exported file, and then click on GO.

Change Configuration of Development website
After copying Website Files and Database, we need to change the database settings and configurations, otherwise, there is a chance that of appearing on Google search then it will be a redirection of your traffic.
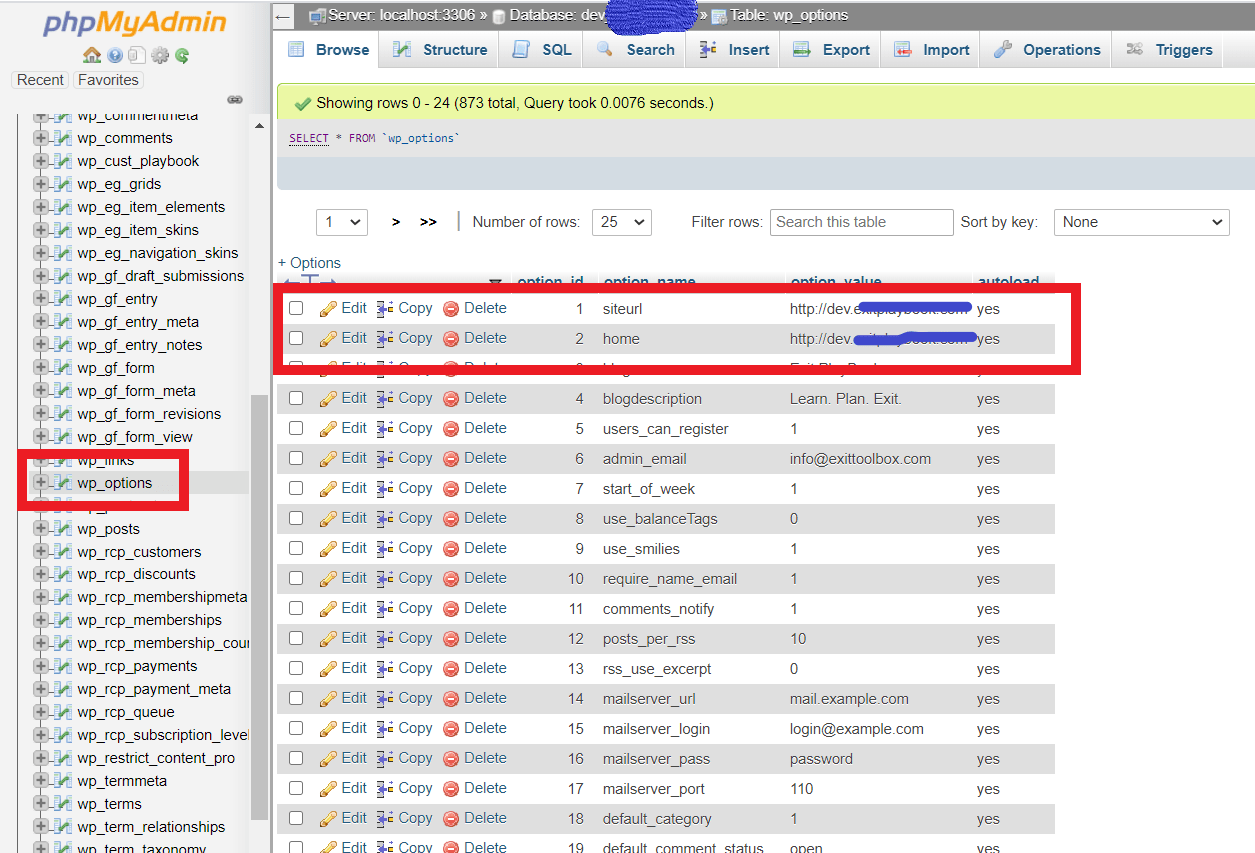
- First, we need to change the Home URL and Site URL in the database, to do so, please select the wp_options table in the new database and change Home URL and Site URL from the Live website URL to Development website URL.
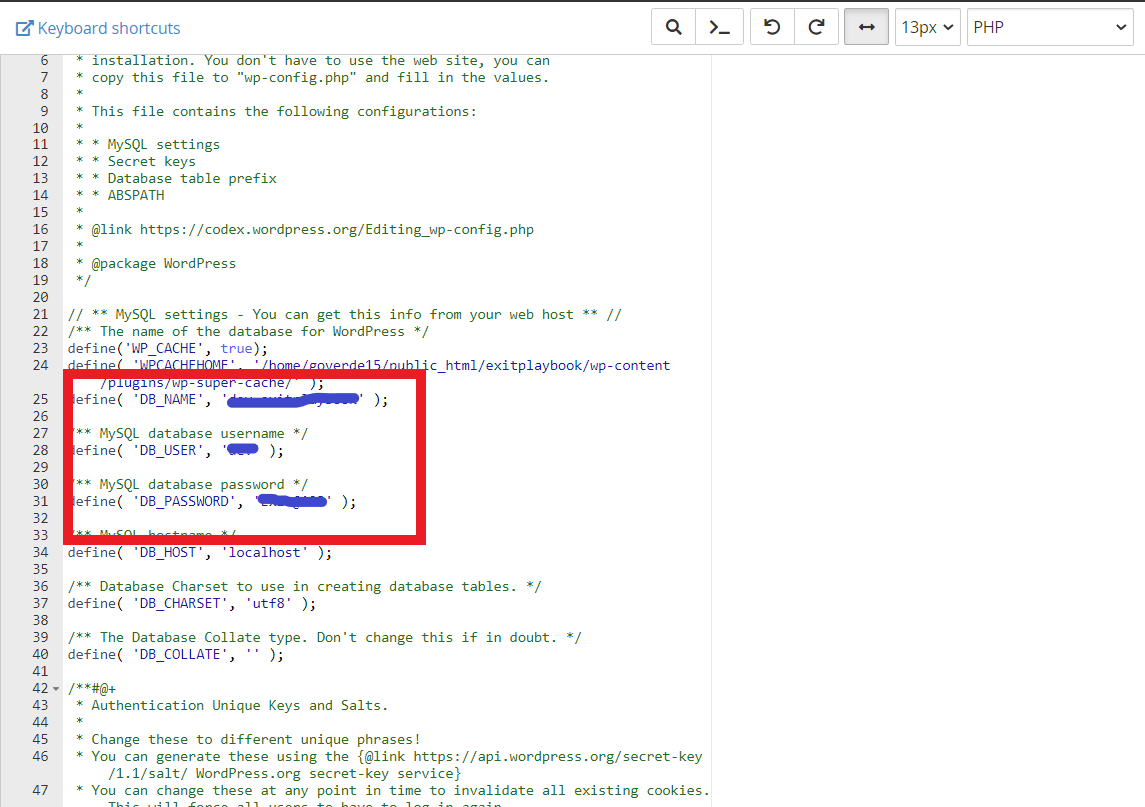
- After changing your Site URL and Home URL, now from the File Manager, go to the development website root directory and then edit the wp-config.php file, change the Database Name, User Name, and Password to the new Database Name, User Name and Password and then save the changes.
Disable SSL for Development Website
Once you change all the configuration and settings, you now need to disable SSL for the development website means, your development website should be HTTP instead of HTTPS.
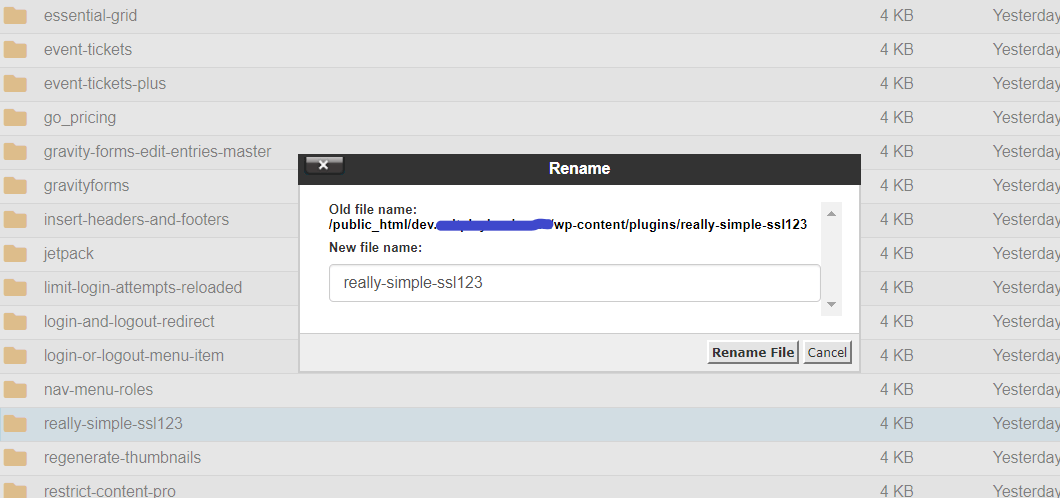
- Go to the development website root directory, click on wp-content, go to Plugins, search, find the SSL plugin, and rename it.
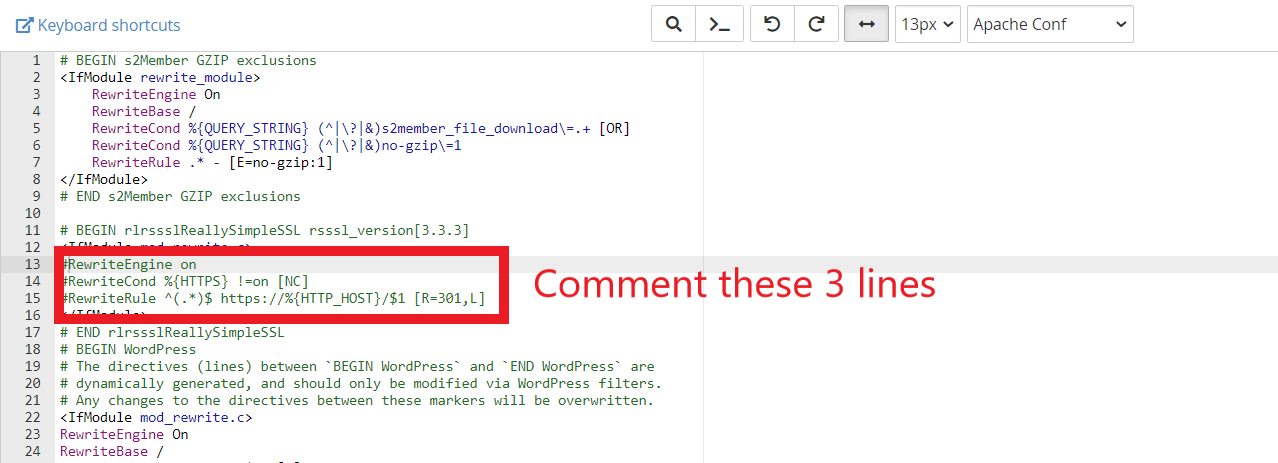
- Now find .htaccess file file in development website root directory and comment 3 lines which are meant for SSL redirection
Now access your sub-domain URL, you can see the replica of your Live website.
Finally, your Development environment is ready for your Live Website.
Also Read: Set up the WordPress Website on AWS EC2 using CentOS 7
Are you looking for the best IT consulting services? We at Erudite Works are the perfect choice for all your needs. We excel in providing exceptional services such as salesforce consulting services, mobile app development, and web application development.



0 Comments