What is AWS?
Amazon Web Services (AWS) is a flexible and secure on-demand cloud computing platform. AWS is the world’s most comprehensive and broadly adopted cloud platform, offering over 200 fully-featured services from data centers globally.
Why AWS for WordPress?
There are many advantages to using AWS for hosting the WordPress site.
-
- Increase the Speed and Agility
- Easy to Use and Maintain
- Cost-Effective
- Secure
- Flexible – Easy to migration Process
- Auto Scaling and Elastic Load Balancing
Deploy WordPress on AWS
You can deploy WordPress on the AWS server by following the below-mentioned steps:
- Sign Up for an AWS Free Tier Account
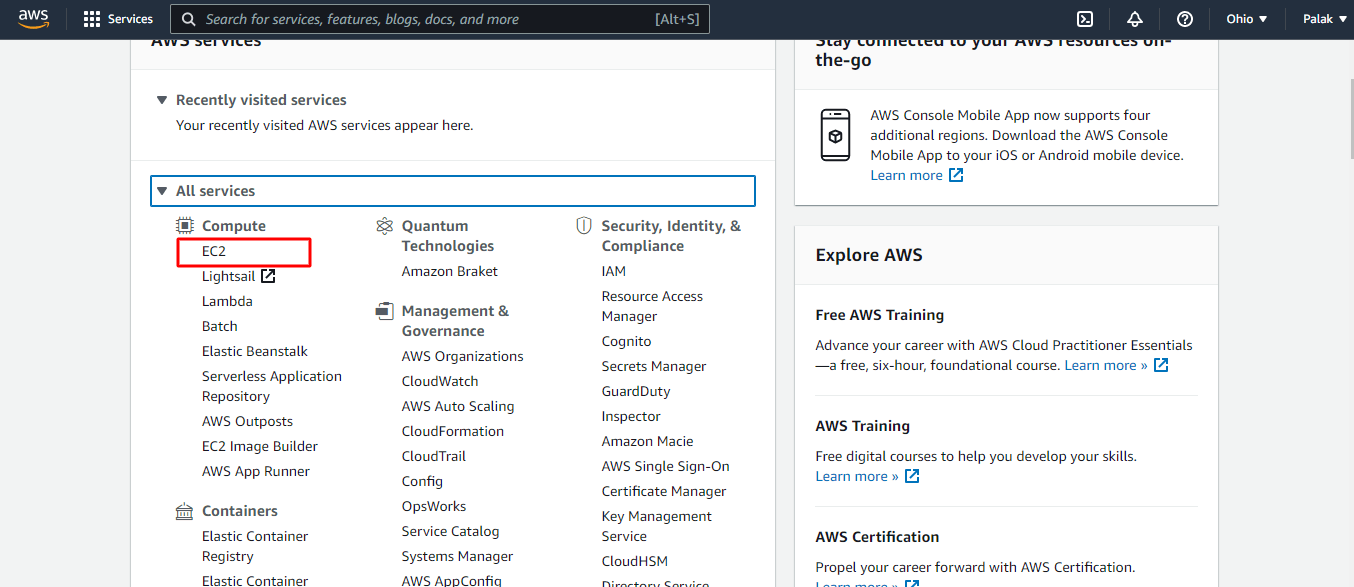
- Login to AWS Free Tier Account and go to All Services -> EC2
- Click on the Launch Instance button.
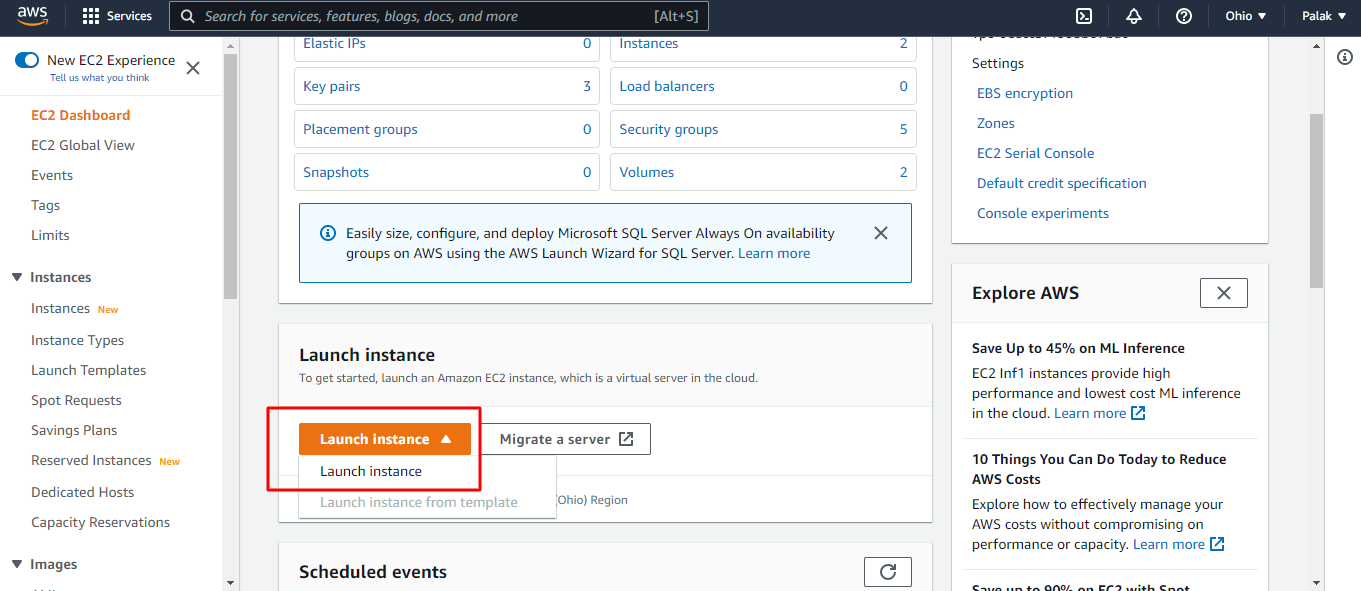
Follow the below 7 steps to actually start the configuration:
1. Choose AMI (Amazon Machine Image) -> Search Centos, In AWS Marketplace
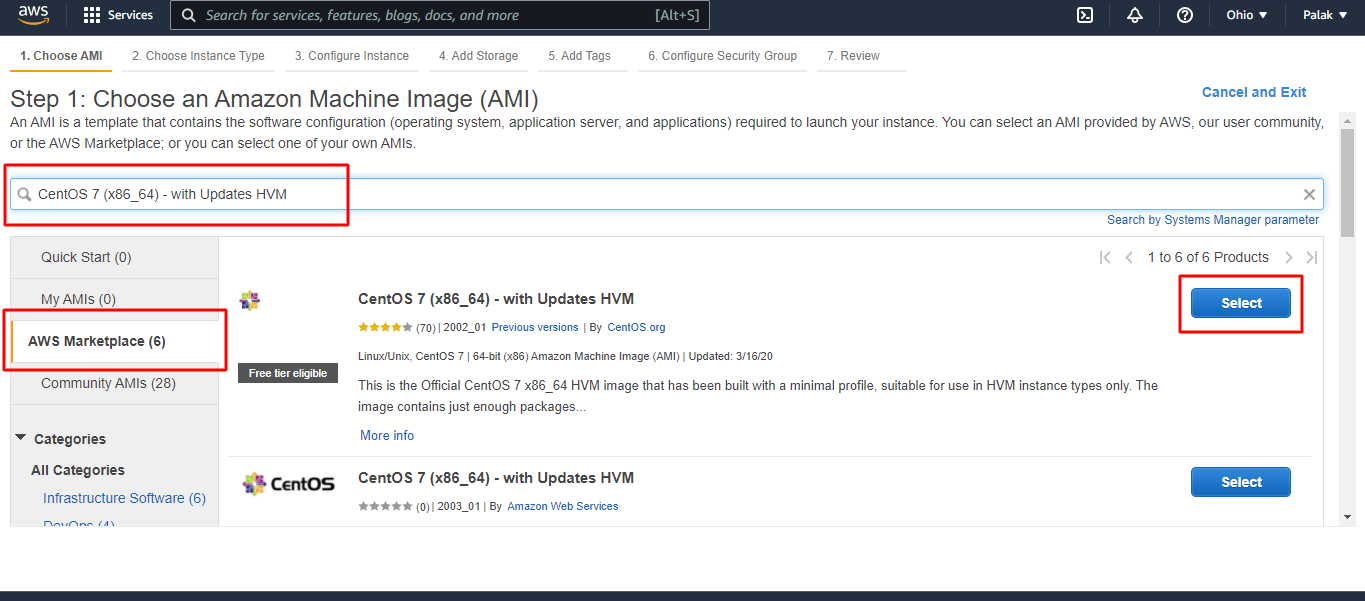
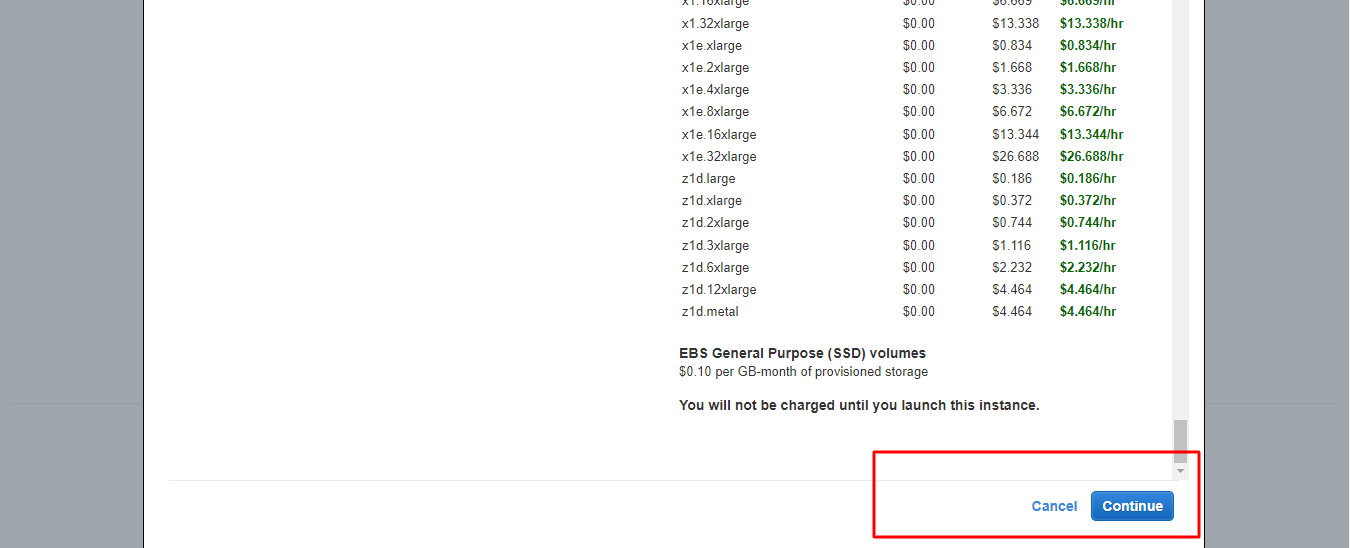
Choose -> CentOS 7 (x86_64) – with Updates HVM -> Continue
2. Choose an Instance Type
Choose – t2 t2Micro (Free Tier Eligible) Then click on the Next button
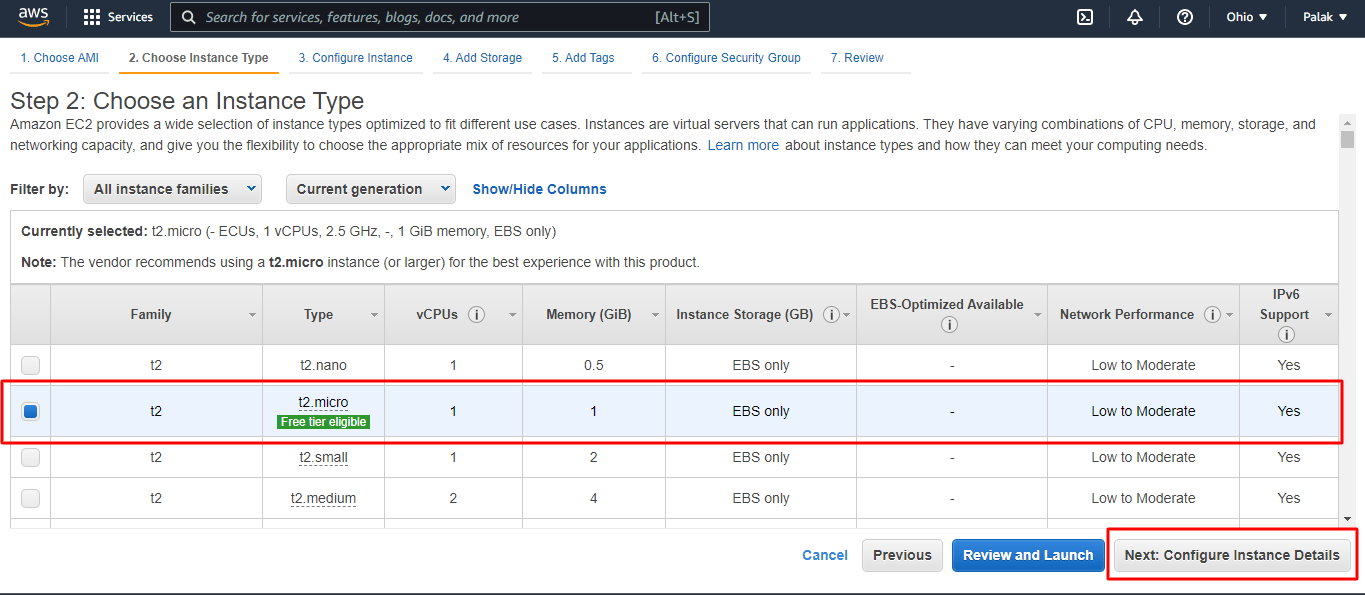
3. Click on the Next button
4. Add Storage Space, by increasing the Size to 20 GiB, and click on the Next button.

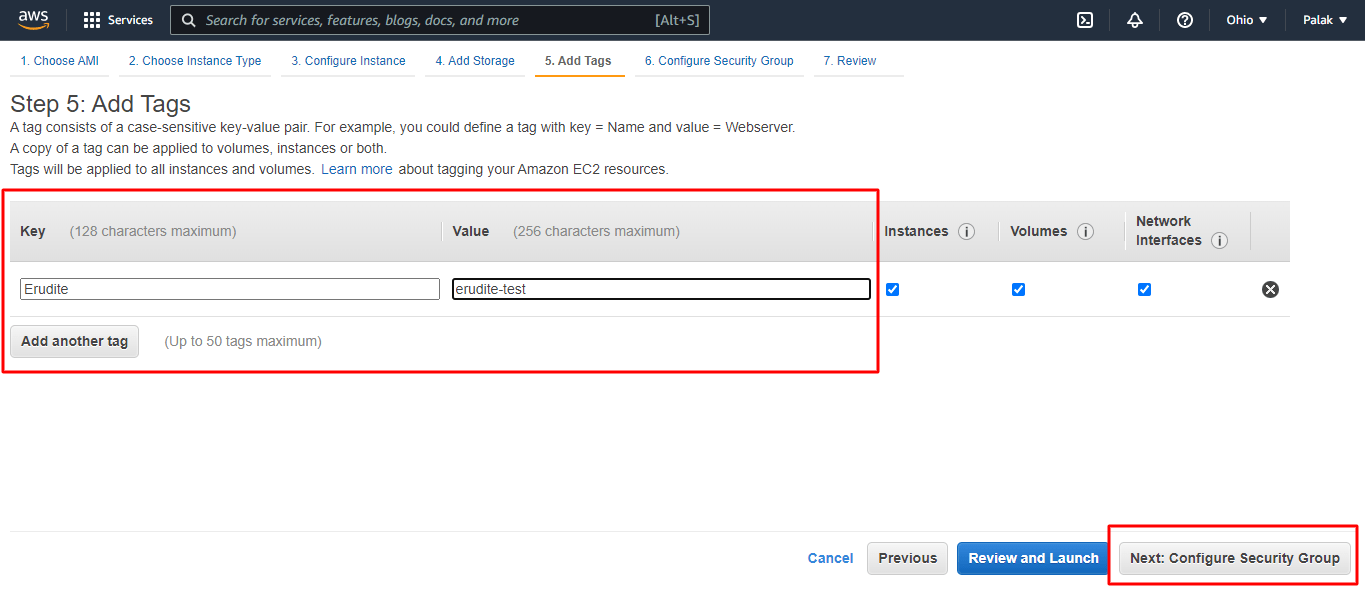
5. Add Tag
Here, you can add any key and value.
E.g. Key is Erudite and value is also erudite-test.
Whatever you want you can add Key and Value.
Add the Key and Value And click on the Next button
6. Add Rule.
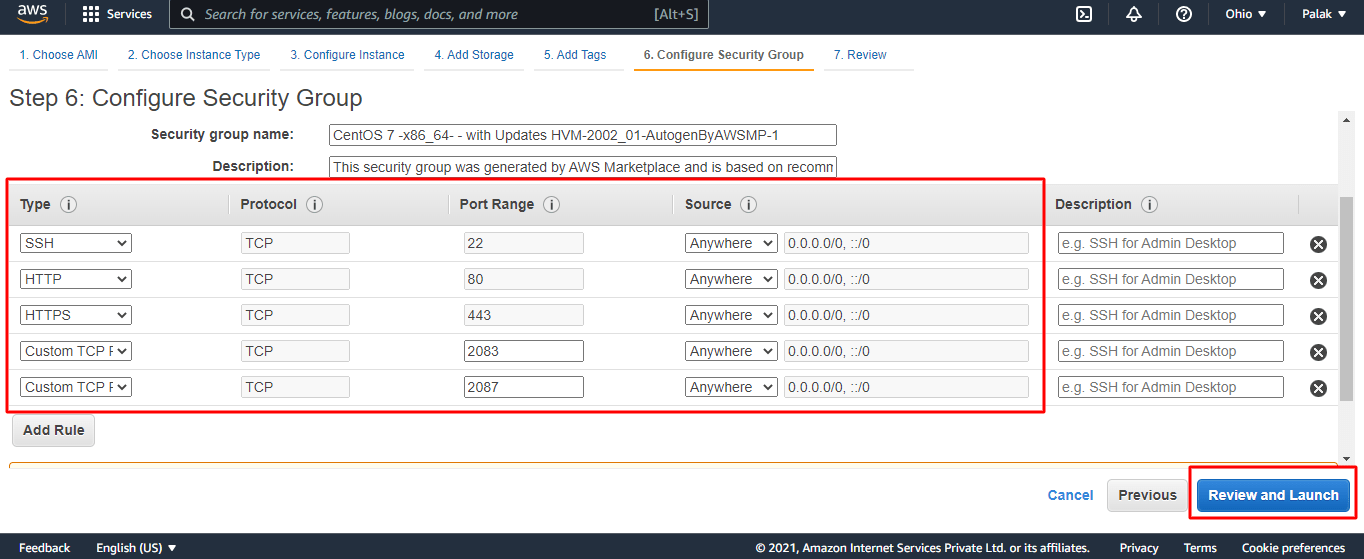
After a rule is added, click on the review and launch button.
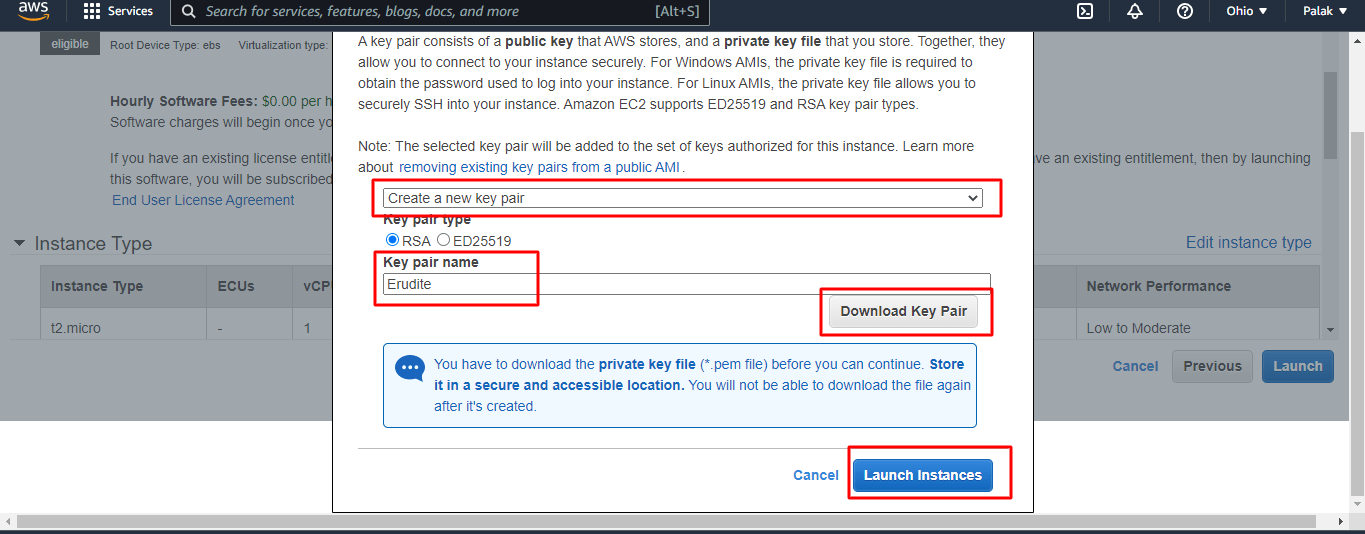
Select create a new key -> Add Key name and click on the Download Key Pair button.
(Downloaded as .pem file)
After downloading, click on the Launch Instance button.
After Click on View Instance. Click on there, You can display the IP Address and Other Details there. Copy That IP Address and Paste in New Tab New Blank WordPress running.
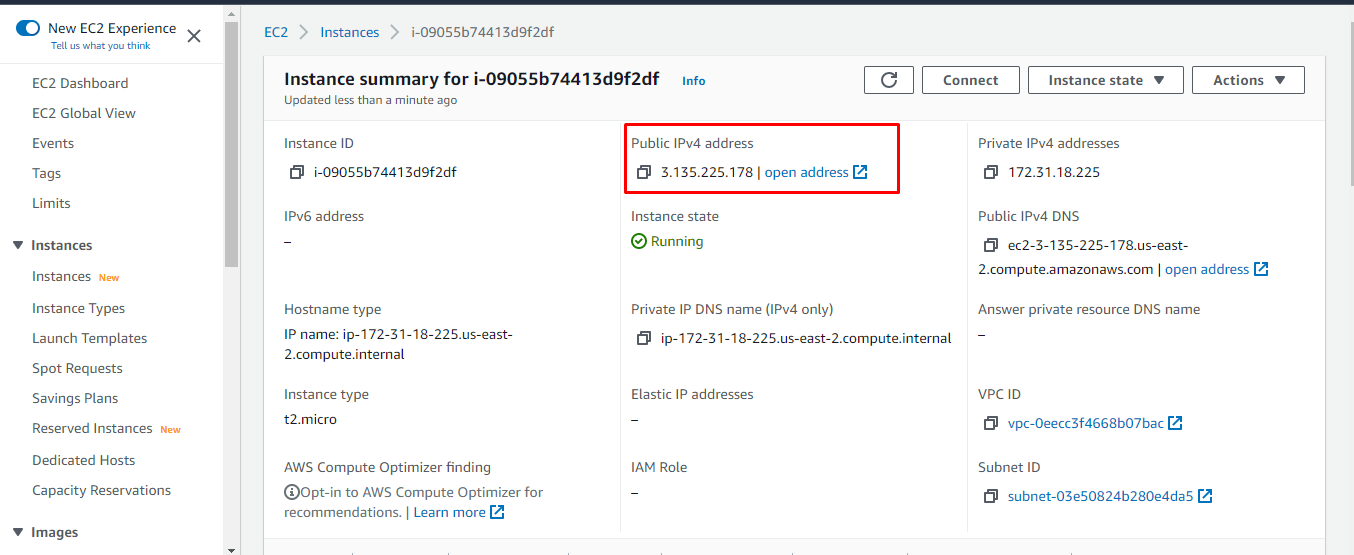
Now Copy, That IP Address and WordPress Blank Site setup Successfully done.
Now, to get the Admin Password
Select the Instance -> Actions -> Monitor and Troubleshoot -> Get System Log.
Here, you can search for the keyword “Password” and can find it as shown below.
Now, With your IP Address/wp-admin – User Name is user and Paste that Password.
Admin Login Successfully Done.

After the login is successfully done, You can change the password.
Also Read: Configure CPanel WHM in AWS EC2 using CentOS 7
Thank you for visiting our blog. We believe our ideas and processes offer valuable insights. Erudite Works Pvt Ltd is a leading IT outsourcing company, dedicated to delivering exceptional results. Our expert team is committed to understanding clients’ unique needs, providing tailored solutions for substantial business growth. With a proven track record, we strive to help clients achieve their goals in the ever-evolving digital landscape. For more about our services, Contact Us.






Im very pleased to find this site. I need to to thank you for ones time for this particularly fantastic read!! I definitely really liked every part of it and I have you bookmarked to see new information on your site.
“israel-lady.co.il – Thank you so much for this positive response. We really appreciate”
We are so grateful for your positive response.
Thank You israel-lady.co.il