How to configure DevOps Center in Salesforce?
In the previous post, we discussed what Salesforce DevOps is and how we can use it to make our work easier and faster and enhance collaborative work experience. If you haven’t gone through that blog, please first refer to the same here. In this blog we would go through the step-by-step guide to setup DevOps Center in Salesforce.
Follow the given steps to configure the DevOps Center in Salesforce:
1. The Salesforce DevOps Center can be accessed through your Setup menu in Salesforce by simply typing “DevOps Center” into the setup search bar.
2. After navigating to the DevOps center, we are supposed to enable the toggle button as shown above to enable the DevOps center in Salesforce.
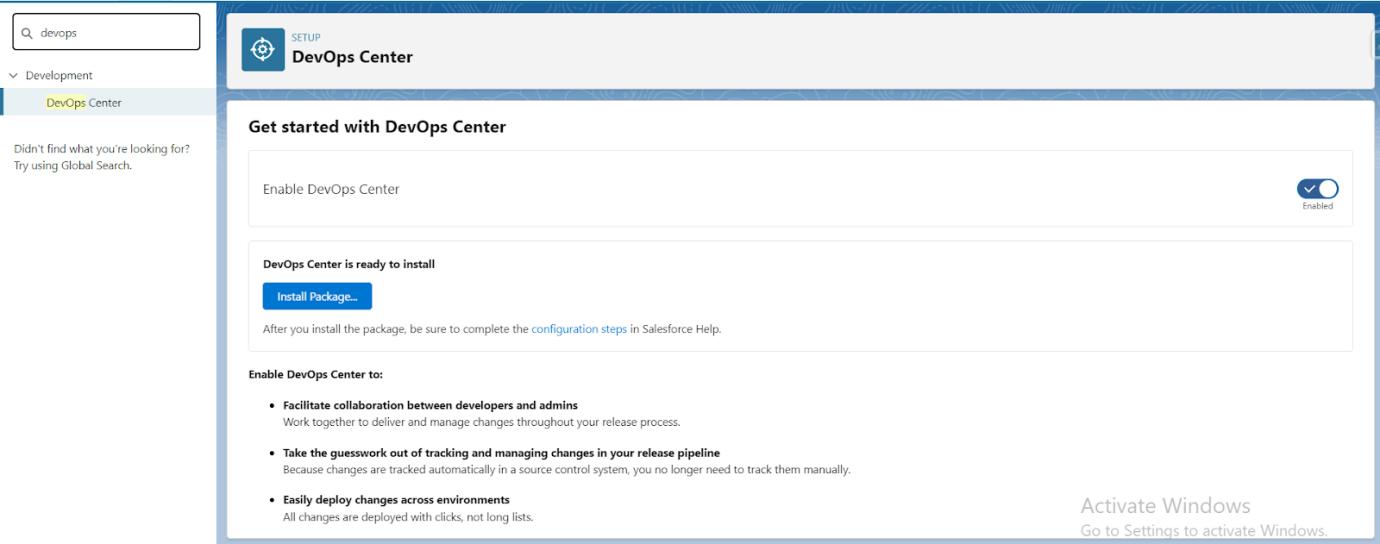
3. Now the next step after enabling the toggle button is to install the package by clicking the Install Package button.

4. After clicking the button it will redirect to the page where it will ask whether you want to install the package for only admins, for all users, or specific profiles. We can select according to our requirements. After this click on Install to install the package.
Approve third-party access to login.salesforce.com and test.salesforce.com.

5. When the installation is completed, to view whether the package is successfully installed or not navigate to: Setup → Quick Find box → (Search) Installed Packages. Here search for the name of the package ie. DevOps Center.
![]()
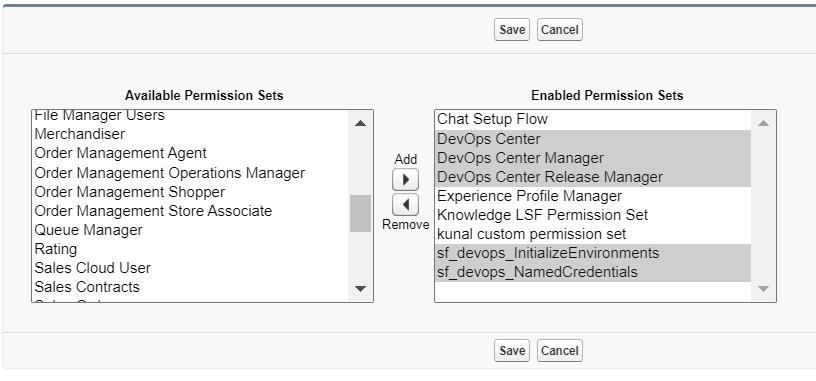
6. Now in the next step, you need to navigate to the Setup → Quick Find Box → Users → Select the user → Permission Set Assignments.
After navigating to the permission set assignments you need to add five permissions to the enabled permission sets from the dual box. And click on save.
Permissions are :
-
- DevOps Center
- DevOps Center Manager
- DevOps Center Release Manager
- sf_devops_InitializeEnvironments
- sf_devops_NamedCredentials
7. Now create one connected app by navigating to Setup → Quick Fin Box → App Manager → New Connected App
In the app creation give the API name, label to the app, contact email, and description.
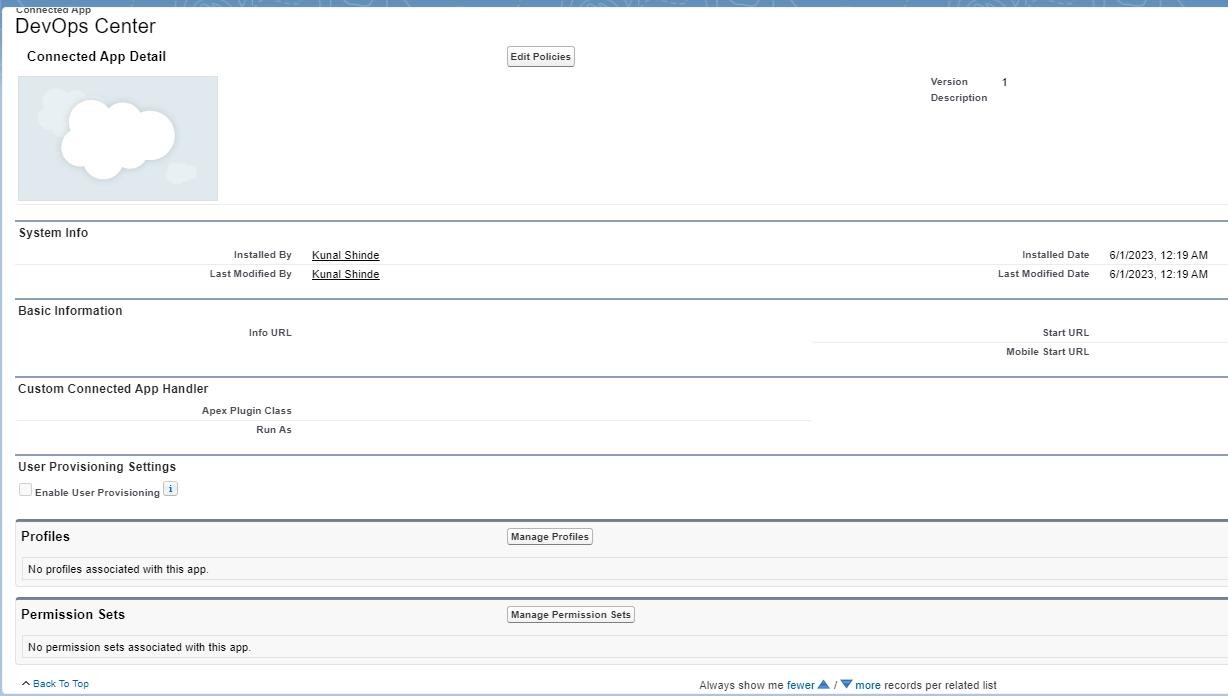
8. Now navigate to the Quick Find box → Manage Connected Apps → Click Manage beside the name of the created connected app.
9. After clicking the button, go to Permission sets → Manage Permission Sets, after that, select sf_devops_NamedCredentials, then click Save.
10. Now the next step is to add IP addresses to the GitHub organization’s allowed list. For that, you need to navigate to :
Log in to your GitHub account → settings from profile → Go to Developer Settings → GitHub Apps → Select app → Click on the edit button next to the name of the app → Find IP Allow List section → In this section add the following IP address
-
- 52.43.33.118
- 44.230.180.227
- 44.225.154.211
- 100.21.209.24
- Add the Salesforce IP address ranges for the org’s region.
For the salesforce IP address range in Salesforce, navigate to Setup → Quick Find Box → Network Access → Here you will get the Salesforce trusted IP address.
Now we need to add this IP address range to the GitHub IP Allow List section.
11. In the next step, we need to navigate to Salesforce, and in the app launcher, we need to search for the app name we had given to the connected app. Click to open it.

12. On selecting the name of the connected app we’ll be able to see this screen.
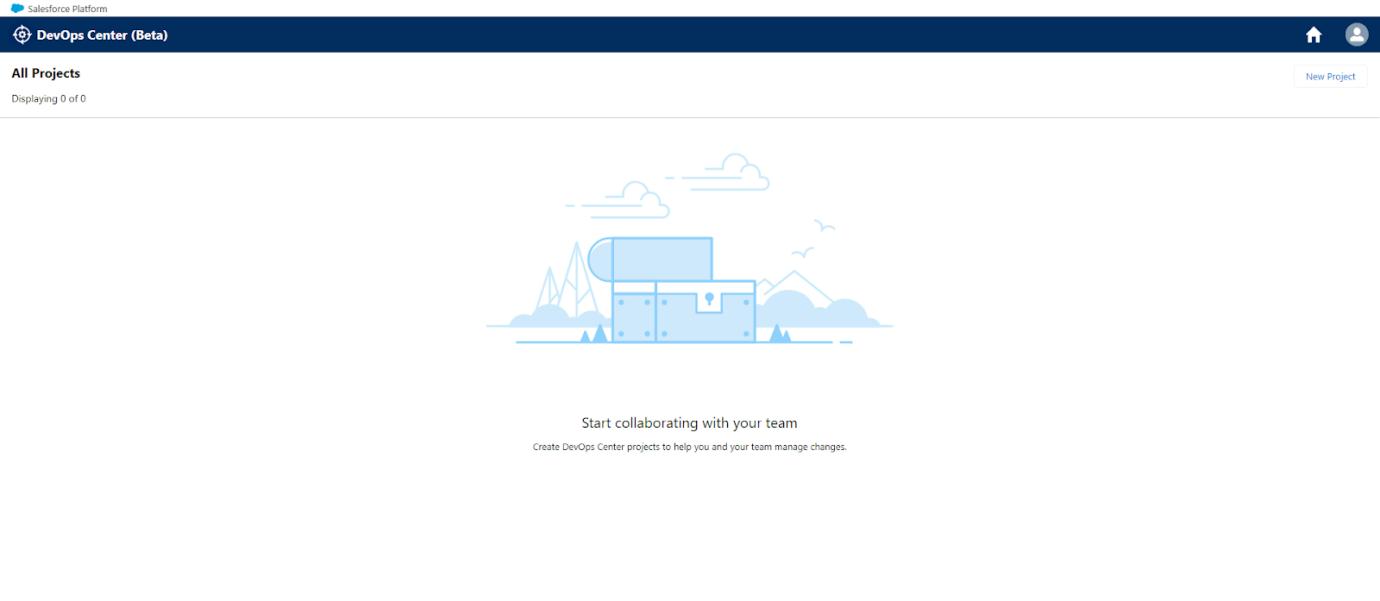
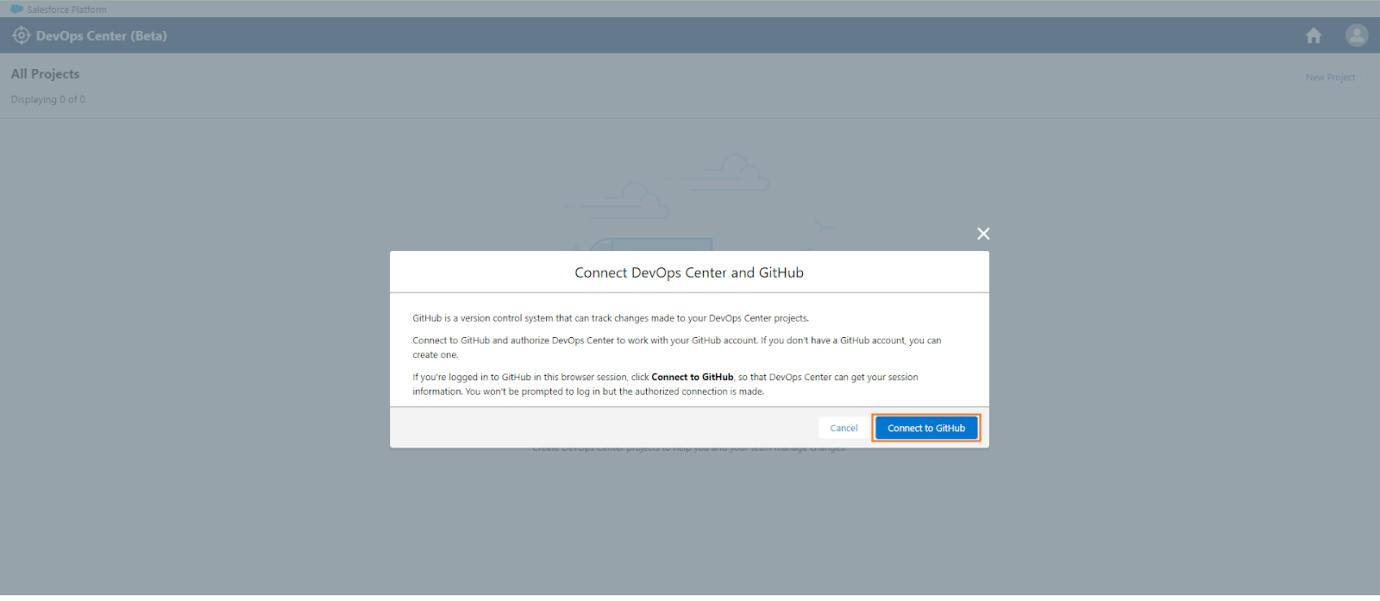
13. Project Creation: Click on the “New Project” button on the DevOps center (Beta) app page. You will see the screen to connect DevOps Center and GitHub. Now click on “Connect to GitHub” (login and authorize your account) to connect your GitHub account with DevOps Center.
14. Click on the “New Project” button again. Enter the name of your project, and you can create a new repository or choose an existing one.

Now click on the save button after entering your details.
15. Add the Release Environment for the Project :
Projects require a release environment (often your production org) and one developer environment. Ascertain that all team members are users in this environment if they need access to it to perform deployments from DevOps Center.
-
- On the All Projects page, under Release Environment, click Click to Connect.
- Provide a unique name for the production environment and indicate the environment type. By default, DevOps Center populates this field with the project name + Release. Environment names must be unique across projects.
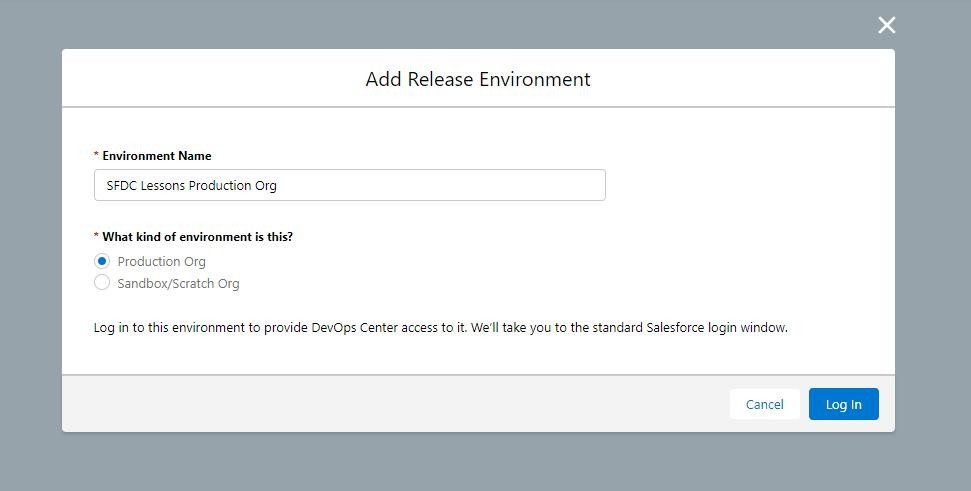
Click login, and provide the required credentials.
16. On the Project page, click the highlighted link text under All Environments.

17. After clicking the “Add” button, you will be presented with a modal box in which you must enter the name of your environment and select the type: Production org OR Sandbox/Scratch org.
Click the “Log in” button and enter your credentials; after successful authentication, you will be redirected back to the settings page.

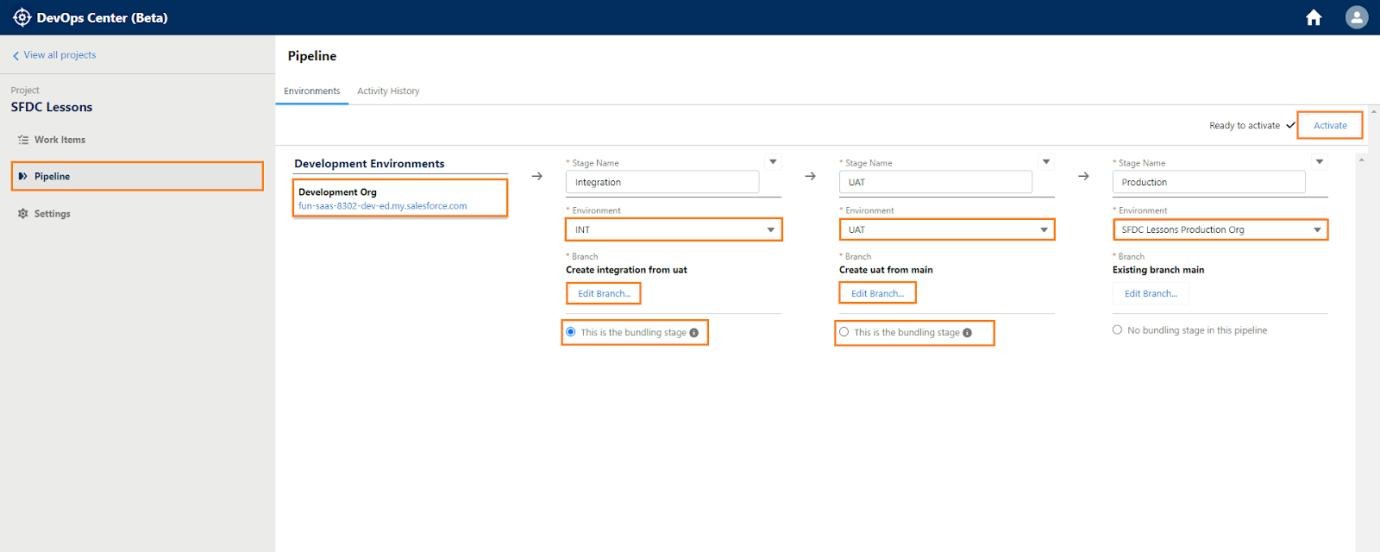
After adding the org’s next step is to plan your pipeline:
A pipeline outlines the stages that work items pass through as they move from development to production during the release lifecycle.
There are various pipeline stages. Each pipeline stage is represented by a branch in the source control repository and an environment (currently a Salesforce org). After any changes have been promoted through the pipeline, they cannot be changed.
Also Read: Common challenges faced during Salesforce implementation and how a partner can help overcome them
Thank you for checking out our blog! If you’re seeking top-notch Salesforce-related services for your company, look no further. Erudite Works is a leading Salesforce consulting firm, providing expert strategies, implementation, and customization of Salesforce CRM to enhance your business’s automation and reporting needs. Our certified team ensures a seamless CRM solution and exceptional consulting services. Contact Us to learn more about our services!




0 Comments